Pre-memory CPU initialization is a vital process that sets the stage for your computer to run smoothly.
Pre-memory CPU initialization is crucial for preparing your computer’s memory during startup. If issues arise, disabling overclocking may help resolve them, ensuring the proper function of your CPU and memory components.
Let’s explore the significance of this process and discover practical solutions for any challenges you may face.
Why Pre-Memory CPU Initialization Error Occurs?
Pre-memory CPU initialization errors happen when your system can’t properly communicate with the CPU before starting memory checks. This may be due to BIOS issues, hardware misconfigurations, or faulty components like RAM or the CPU.
Fix #01 To Resolve Pre Memory CPU Initialization?
Step 1: Disable Overclocking:
Turn off overclocking to see if it’s causing the error. Overclocking can stress the system, leading to initialization issues.
Step 2: Reset The BIOS (CMOS Clear):
Resetting the BIOS clears potential misconfigurations. To do so, use the motherboard’s reset button or remove the CMOS battery for a few minutes.
Step 3: Minimal Configuration:
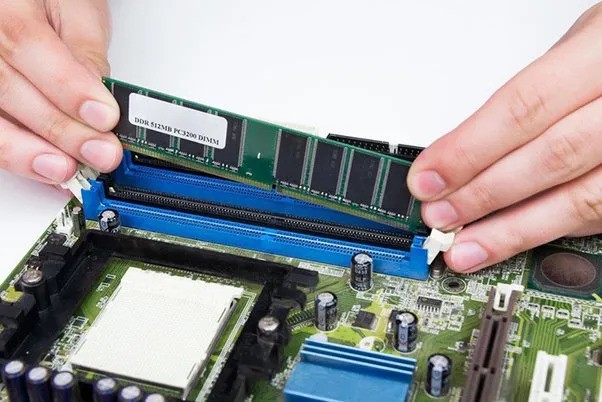
Boot your system with only the essential components—CPU, RAM, and GPU—to help isolate faulty hardware more easily.
Step 4: Boot The PC:
Turn on the PC after making changes to see if the error is fixed. If it works, you can gradually reintroduce other components.
Also Read: Baldur’s Gate 3 High CPU Usage: Exploring Performance Issues
Step 5: Gradual Component Testing:
Add back one component at a time, checking if the error reappears. This method helps identify the problematic part.
Step 6: Full System Assembly:
Once all components are tested and the system boots, fully reassemble the PC. Make sure all connections are secure for a smooth restart.
Fix #02 To Resolve Pre Memory CPU Initialization?
Step 1: Probe Removal:
Remove any external probes or devices connected to the system. These can interfere with initialization and cause errors during the boot process.
Step 2: Check The CPU Socket:
Carefully inspect the CPU socket for bent or damaged pins. A misaligned CPU can cause initialization issues that prevent proper booting.
Step 3: Memory Seating:
Ensure your RAM sticks are seated correctly in their slots. Misaligned memory can trigger errors in the pre-memory initialization phase.
Step 4: CPU Cooler Inspection:
Check if the CPU cooler is firmly installed. A loose or misaligned cooler can cause overheating or disrupt the CPU, leading to boot issues.
Step 5: Power Supply Connections:
Verify that all power supply cables, especially the CPU, are correctly connected. Poor power delivery can cause the system to fail pre-memory initialization.
Step 6: Simplified Setup:
Use only essential components when testing. A minimal hardware setup can help isolate faulty parts more quickly, making troubleshooting smoother.
Step 7: BIOS Reset:
Reset the BIOS to default settings by using the reset button or removing the CMOS battery. This clears any possible misconfigurations.
Step 8: GPU Check:
Ensure your GPU is correctly seated in its slot. Improperly installed graphics cards can lead to boot issues and errors during initialization.
Step 9: Monitor Input:
Check the monitor input and cable connections to ensure they are correct. Incorrect monitor settings or connections can cause display issues during boot.
Also Read: CPU Speed 1.1 GHz – Is It Fast Enough For Everyday Use?
Fix #03 To Resolve Pre Memory CPU Initialization?
Step 1: Reseat the RAM:
Remove and reinsert the RAM sticks to ensure they’re properly seated. Sometimes, a loose connection can trigger pre-memory initialization errors.
Step 2: Try a Single RAM Stick:
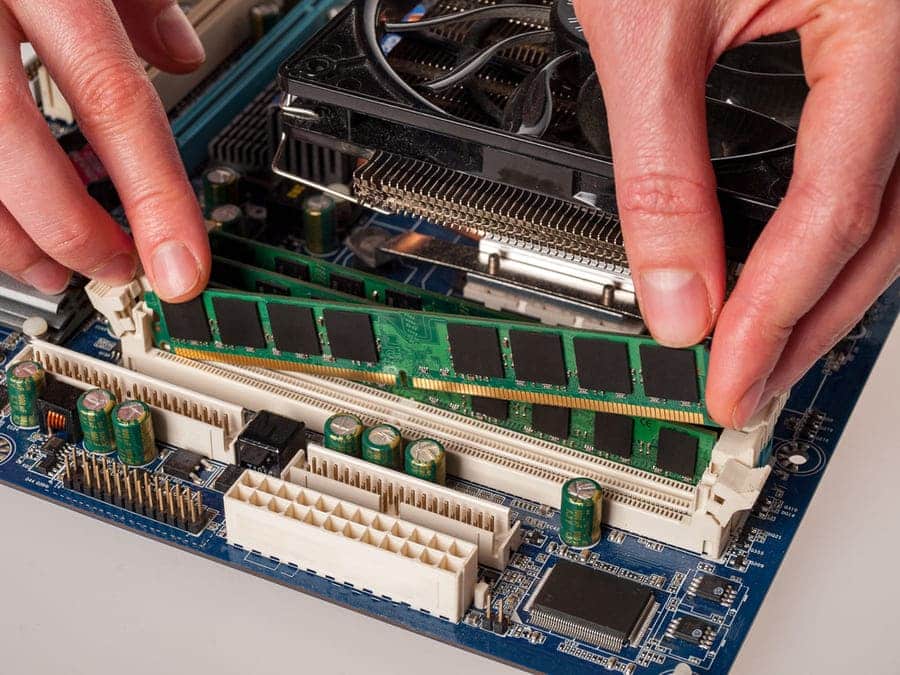
Try booting with just one RAM stick. This will help you identify if one of the memory modules is faulty, simplifying troubleshooting.
Step 3: Check For Loose Connections:
Inspect all hardware connections, including power cables and data connections, to ensure nothing is loose or disconnected, causing initialization problems.
Step 4: Inspect For Bent CPU Pins:
Carefully check the CPU socket for bent pins. Misaligned pins can disrupt communication between components and prevent the system from booting correctly.
Step 5: Test With Minimal Hardware:
Remove non-essential components and boot with the bare minimum. This helps isolate which hardware might be causing the issue.
Step 6: Try A Different GPU Slot:
Move the graphics card to another slot on the motherboard. Sometimes, a faulty or misaligned PCIe slot can prevent proper initialization.
Step 7: Monitor Your PSU:
Ensure the power supply unit (PSU) is functioning correctly. Insufficient power delivery can lead to issues during the pre-memory initialization stage.
Step 8: Inspect For Physical Damage:
Check for any signs of physical damage on your motherboard or components, such as burn marks or broken parts, which might be causing errors.
Step 9: Check For BIOS Updates:
Look for any available BIOS updates from the manufacturer. New firmware can resolve bugs and improve system compatibility.
Step 10: Contact Manufacturer Support:
If all else fails, contact your motherboard or system manufacturer for support. They can offer expert advice or potential replacement options.
The Importance of Pre-memory CPU Initialization
1. Overview of Pre-memory CPU Initialization
Pre-memory CPU initialization prepares your system’s essential components, like cache, memory, and power management, ensuring everything runs appropriately before the main boot phase begins.
A. Cache Configuration
During this phase, the CPU cache is set up, allowing faster access to frequently used data and helping the system work more efficiently.
B. Memory Controller Initialization
This step sets up communication between the CPU and memory, ensuring data can flow smoothly and your computer can start working without errors.
C. System Management Mode (SMM) Initialization
SMM is initialized here to control low-level system tasks, like power management and system security, ensuring everything functions smoothly before booting.
2. CPU Features and Capabilities Initialization
During this phase, the CPU’s advanced features, such as virtualization and power management, are prepared to ensure your system is ready to perform efficiently.
Must Read: ROG Live Service High CPU – Causes And Solutions In 2024!
A. Virtualization Support Initialization
If your CPU supports virtualization, this phase activates it, enabling your system to run virtual machines or sandboxed environments for enhanced performance.
B. Power Management Features Initialization
The CPU’s power-saving features are set up here, optimizing energy use and helping to reduce heat and power consumption without affecting performance.
C. Performance Settings Initialization
CPU performance settings are initialized to ensure optimal speed and efficiency, ensuring the system can handle tasks smoothly once fully booted.
D. Security Features Initialization
Security features, like secure boot and encryption support, are activated to protect your system from potential threats during the boot process and beyond.
E. The Significance of Pre-memory CPU Initialization
This stage is critical as it ensures all key components are correctly set up, leading to a smooth and stable boot process and overall system performance.
Pre-memory CPU Initialization Process
The pre-memory CPU initialization process prepares your CPU and memory controllers to communicate before your system fully boots. It ensures essential hardware functions are set up correctly for a smooth and error-free startup.
What is CPU post memory initialization?
CPU post-memory initialization comes after memory settings are configured. This stage ensures that the memory and CPU work together without errors. Any issues here can cause boot failures or system crashes.
CPU post memory initialization error 33
Error 33 occurs when the system has trouble initializing the memory after the CPU has been set up. This often indicates a hardware or memory configuration issue, stopping the boot process.
CPU post memory initialization error 34
Error 34 generally points to issues in the memory initialization phase. It may be caused by incorrectly seated RAM, faulty memory, or BIOS settings incompatible with the memory modules.
CPU post memory initialization error 36
Error 36 usually signals a failure during the memory initialization stage. This might happen due to incorrect memory configuration, faulty hardware, or mismatched components.
Fixed! – First Post – ASUS Crosshair VIII Q-code stops at 15
Q-code 15 on an ASUS Crosshair VIII motherboard usually occurs during pre-memory CPU initialization. This can often be fixed by resetting the BIOS, reseating components, or checking for firmware updates.
Msi debug code 19, Early South bridge Initialization
Debug code 19 on MSI motherboards refers to an early South Bridge initialization error, in which the chipset responsible for connecting components like USB and PCI fails to start. Resetting the BIOS or reseating components can help.
Pre memory CPU initialization is started Windows 11
In Windows 11 systems, pre-memory CPU initialization is a normal process that sets up essential system hardware. Errors here usually indicate hardware issues or conflicts with BIOS settings that need troubleshooting.
Must Read: Is 4000 RPM Too Low For A CPU Fan? – Detailed Guide In 2024!
PCH initialization after microcode loading
PCH (Platform Controller Hub) initialization follows microcode loading. It prepares the chipset for communication with the CPU and other components. Errors in this phase could signal hardware or firmware issues affecting system stability.
CPU post-memory initialization
This stage confirms that the memory is configured correctly and communicates smoothly with the CPU. If errors occur here, they often involve faulty RAM, incorrect BIOS settings, or connection issues with the memory modules.
How do I fix CPU post memory initialization?
To fix CPU post-memory initialization:
- Start by reseating the RAM and resetting the BIOS.
- Try a single RAM stick, check for loose connections, and update the BIOS if needed.
- If unsuccessful, seek technical support.
What is code 14 on Asus x670e hero?
Code 14 on the Asus x670e Hero indicates an issue with the pre-memory system. This may be related to the memory setup. To resolve it, reseat your RAM, reset the BIOS, or update your motherboard firmware.
Q-Code 12, 54, 55 on Asus Z690-E
Q-Codes 12, 54, and 55 on the Asus Z690-E motherboard usually point to memory issues. They often indicate improperly seated RAM or compatibility problems. Reseating the memory and updating the BIOS can help resolve them.
Memory code 15 ASUS
Memory Code 15 on ASUS motherboards refers to an issue during pre-memory initialization, specifically with the system agent. Clearing the CMOS, reseating the RAM, or updating the BIOS might help fix the problem.
Gene-Z Code 19
Gene-Z Code 19 refers to an early initialization error in ASUS motherboards, usually connected to memory or South Bridge issues. Troubleshoot by resetting the BIOS, reseating components, and updating motherboard firmware if needed.
Q-Code 14
Q-Code 14 typically indicates a problem during pre-memory CPU initialization. This may occur due to issues with the memory modules, such as poor seating or incompatibility. Recheck your RAM and update your BIOS to fix it.
Error code 55 on Gigabyte mobo
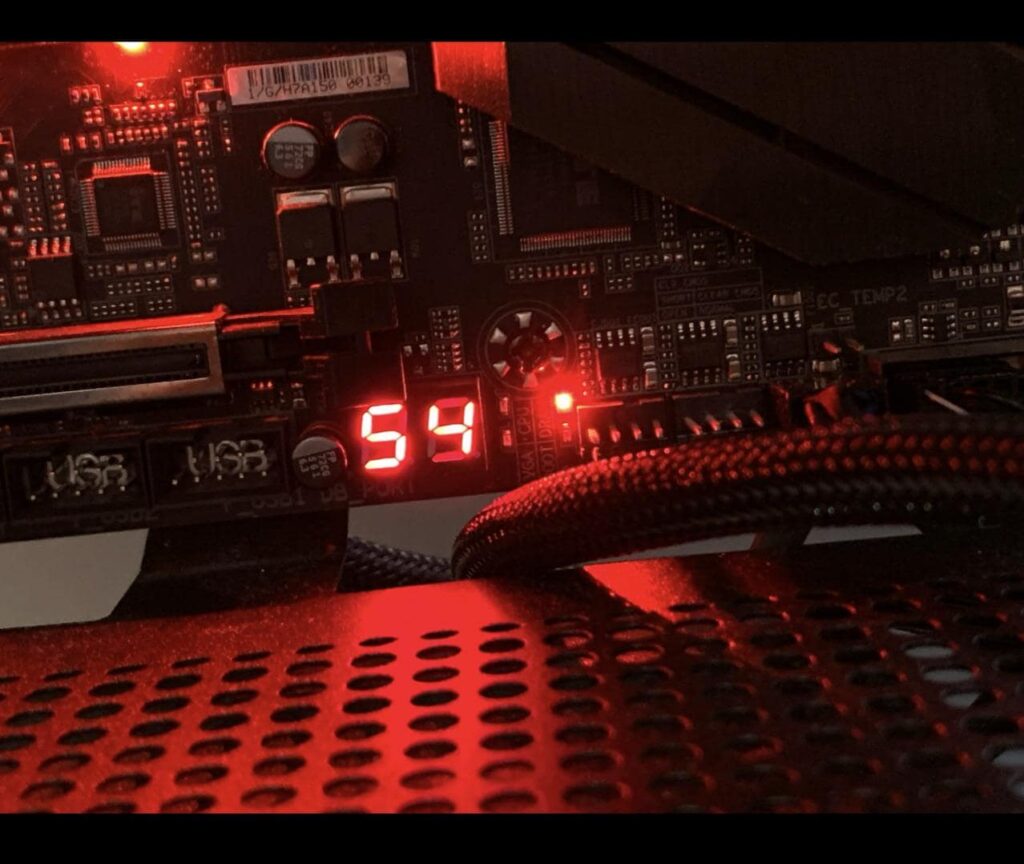
Error code 55 on Gigabyte motherboards usually means the system cannot detect memory. To resolve the issue, reseat your RAM sticks, ensure compatibility, or try a different RAM stick. BIOS updates may also help.
Motherboard error Cf 46, memory initialization error or something more?
Error code Cf 46 often points to a memory initialization problem. Check that your RAM is seated correctly, try a different memory stick, and update your BIOS. Other hardware or configuration issues could also cause this error.
Q code 18 error Pc turns on and Then turns off aften 1 sec?
The Q-Code 18 error indicates a pre-memory initialization failure. If your PC turns off quickly, check the RAM, power supply, and CPU. Reseat components and reset the BIOS to troubleshoot, then try booting again.
Must Read: Vtdecoderxpcservice High CPU – Top Ways To Lower Usage!
URGENT! Motherboard errors
Motherboard errors can happen for many reasons, from RAM issues to faulty connections. Try reseating components, resetting the BIOS, and checking for updates. If the problem persists, seek professional help or contact manufacturer support.
15 motherboard code
Code 15 on motherboards usually means there’s a problem with memory initialization. To fix this, check your RAM connections, ensure compatibility, and reset the BIOS. Reseating the RAM often helps resolve the issue.
Motherboard error code list
A motherboard error code list helps identify problems during boot. Each code corresponds to specific issues, like memory failures or CPU errors. Knowing these codes aids in troubleshooting and fixing hardware problems efficiently.
Maximus VI Formula Q-Code 19 Pre-memory PCH initialization is started.
Q-Code 19 on the Maximus VI Formula means the pre-memory PCH (Platform Controller Hub) initialization has started. Check connections, update the BIOS, or reseat components to troubleshoot if the boot process hangs here.
What is a “CPU post memory initialization” Q-code? (x-post from r/techsupport)
A “CPU post memory initialization” Q-code indicates that the CPU has started initializing system memory. If this process fails, it can lead to boot issues. Checking RAM and BIOS settings can help resolve it.
Misteria of the Old Computer Or Constantly Looping On Pre-memory north-bridge initialization is started
If your old computer is stuck in a loop during pre-memory north-bridge initialization, it likely has hardware issues. Check RAM, connections, and motherboard components. Reseating parts can sometimes fix these looping problems.
ASUS Z97 Pro and i5-4690k CPU: Q Code 13 and Cpu_led light flashes
Q-Code 13 on an ASUS Z97 Pro motherboard, with a flashing CPU LED, typically indicates a memory initialization problem. Ensure RAM is correctly seated and compatible. Resetting the BIOS might also resolve the issue.
Maximus Gene VII Q Code 15 (Pre-memory System Agent initialization is started)
Q Code 15 on the Maximus Gene VII indicates the pre-memory system agent initialization process. If the system fails to boot, check RAM seating and power connections and consider BIOS updates to troubleshoot the issue.
Error Code 15 pre memory system agent initialization is started?
Error Code 15 means the pre-memory system agent is trying to initialize but failing. This often relates to RAM issues. Reseat your memory sticks and ensure they are compatible with your motherboard for a solution.
EXPO delays boot up by 1min with “Pre-memory System Agent initialization is started” but works fine after boot
If EXPO causes a one-minute boot delay during “Pre-memory System Agent initialization,” it could be due to overclocking settings. Check your memory profiles and adjust BIOS settings to optimize boot performance.
Unable to initialize memory with z690 motherboards. Unable to boot to bios, stuck at Q-Code 11
Stuck at Q-Code 11 on Z690 motherboards means memory initialization failed, preventing BIOS access. To fix this, check RAM seating, test different memory slots, and ensure compatibility. Resetting the BIOS can also help.
FAQs
1. Why is pre-memory CPU initialization important?
Pre-memory CPU initialization is crucial for checking hardware. It ensures components work correctly before the system boots.
2. What is pre-memory CPU initialization?
Pre-memory CPU initialization is when the CPU checks memory and other components before starting the system.
3. How long does pre-memory CPU initialization take?
Pre-memory CPU initialization usually takes a few seconds, but it can take longer if there are issues.
4. What happens during pre-memory CPU initialization?
During pre-memory CPU initialization, the CPU verifies the memory and initializes necessary hardware before the operating system loads.
5. What causes CPU error?
CPU errors can be caused by overheating, faulty hardware, incorrect BIOS settings, or incompatible system components.
6. What is CPU post-memory initialization error 32?
Error 32 during CPU post-memory initialization indicates a memory failure. It suggests issues with RAM or its connections.
7. How do I fix my CPU memory?
To fix CPU memory issues, reseat the RAM, check compatibility, and update BIOS settings if necessary.
8. Can pre-memory CPU initialization be skipped?
No, pre-memory CPU initialization cannot be skipped. It’s essential to ensure all components are functioning correctly before booting.
9. How do I reset my CPU RAM?
Resetting your CPU RAM involves turning off the power, removing the RAM sticks, and reseating them securely.
10. What does reset CMOS do?
Resetting CMOS restores BIOS settings to factory defaults, which can fix boot issues and configuration problems.
Conclusion
In conclusion, understanding pre-memory CPU initialization is essential for troubleshooting startup issues. By following the recommended steps, such as disabling overclocking and checking hardware connections, you can ensure your system operates smoothly and efficiently from the beginning.

